Getting Started
Your First Bell Schedule
Create one supervised test event, verify the complete audio path, then build the full school day.
Before You Begin
Complete initial configuration and confirm the computer or production audio host is ready.
Steps
- Open Bell Schedule Editor from the Campus Bell navigation.
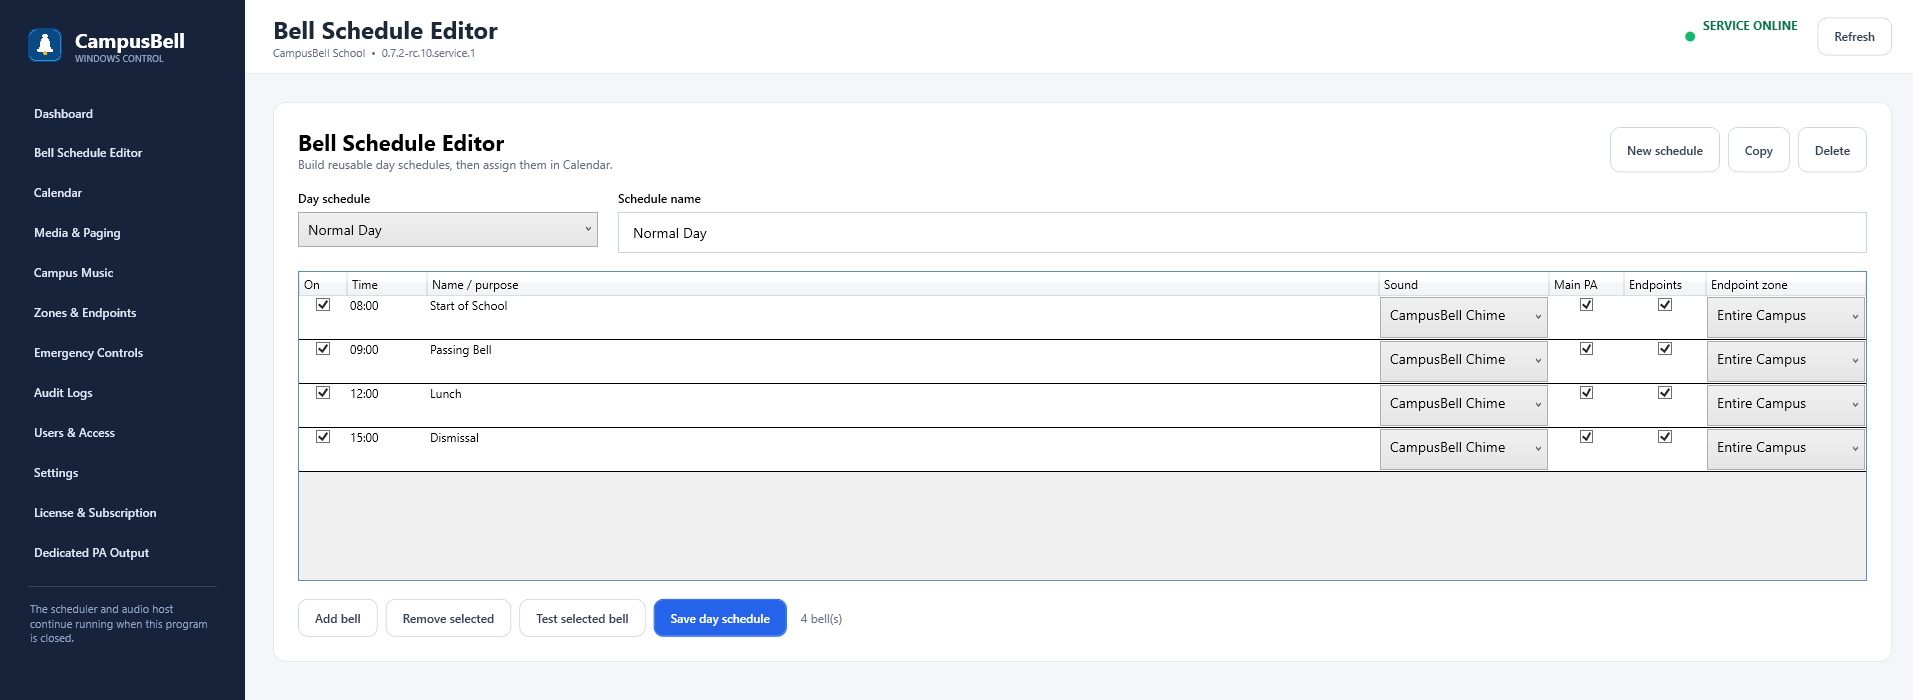
- Select New schedule and give the Day Schedule a clear name such as “Standard Day.”
- Select Add Bell. Enter the time and purpose, choose an approved sound, and choose Main PA and/or Endpoints. Select endpoint zones only when endpoints are configured.
- Select the bell row, then choose Test selected bell and confirm the sound is heard through the intended output.
- Select Check Schedule. Resolve any blocking issue.
- Select Save Day Schedule.
- Open Calendar and assign the saved Day Schedule to the intended weekday or date exception.
- Create one supervised event a few minutes in the future, close the Admin browser, and confirm unattended playback.
- Open Audit Logs and confirm the event was recorded.
Expected Result
The saved event plays at the scheduled time through the selected output without requiring the Admin browser to remain open.
Troubleshooting
If the Test action works but the scheduled bell does not, confirm the Calendar assignment, Windows clock and time zone, event state, and saved schedule. See Schedule did not play.